A new bathroom mirror can completely change the feel of your space, but a poor installation can ruin the entire effect. A slightly crooked frame, a mirror hung too high, or using the wrong anchors can turn a beautiful addition into a daily frustration. Even worse, a mistake during the bathroom mirror installation process could lead to a damaged wall or a shattered mirror on your floor. I’ve seen these common errors time and again, and the good news is they are all preventable. This guide is your roadmap to getting it right the first time, helping you avoid the pitfalls that trip up many DIY projects.
Key Takeaways
- Plan Before You Drill: Confirm your placement with painter’s tape to visualize the final look. Then, locate wall studs or select anchors specifically rated to hold more than your mirror’s weight to ensure a secure foundation.
- Match Your Method to the Wall: Your wall surface dictates the installation. Use robust anchors for drywall if you can’t find a stud, choose a mirror-safe adhesive for tile to prevent cracks, and use a hammer drill with masonry anchors for brick or concrete.
- Prioritize Safety and Precision: Always use a level for a perfectly straight result and protect your mirror’s reflective backing by using only mirror-safe adhesive. For heavy or large mirrors, working with a partner is essential for preventing accidents and ensuring a smooth installation.
What You’ll Need for the Job
Before you unwrap that beautiful new mirror, let’s get your tools in order. Having everything ready to go makes the installation process much smoother and safer. Think of it as your pre-project checklist to ensure a perfect, secure hang.
For measuring and marking
Precision is key to hanging a mirror so it looks just right. You’ll need a tape measure for getting the dimensions spot on and a level to avoid a crooked result. Use a pencil to make light marks on the wall that you can easily erase later. Painter’s tape is also great for visualizing the mirror’s placement before you commit to drilling any holes. This helps you see exactly how it will look and confirm you love the height before making anything permanent.
For drilling and fastening
To securely attach the mirror to the wall, you’ll need a drill and the right bits. A stud finder is your best friend for locating the strong wooden beams behind your drywall; this is the most secure place to hang anything heavy. If you can’t find a stud in the right spot, you’ll need to use the right wall anchors for the job. Make sure they are rated to hold more than the weight of your mirror to prevent any accidents down the road.
Mirror-safe adhesives and mounting hardware
Check your mirror’s instructions to see what hardware it came with, which might include clips, brackets, or a channel bar. If you plan to use glue, it is critical to use a mirror-safe adhesive, often called mirror mastic. Regular construction adhesives can release chemicals that eat away at the silver backing of the mirror over time, creating ugly black spots. Always double-check that your product is specifically made for mirrors to keep it looking flawless for years.
Essential safety gear
Safety first, always. A good pair of work gloves will protect your hands from sharp edges when you’re handling the mirror, especially if it’s a frameless style. You’ll also want a pair of safety glasses to shield your eyes from dust and debris, especially when you start drilling into the wall. It only takes a second to put them on, and it’s a simple step that prevents a serious injury. Don’t skip it.
How to Find the Perfect Spot for Your Mirror
Finding the right place for your bathroom mirror is about more than just seeing your reflection. The perfect placement can make your whole bathroom feel more balanced, spacious, and bright. Think of your mirror as a functional piece of art; where you hang it and how it’s sized can completely change the feel of the room. Getting it right means creating a space that’s not only practical for your daily routine but also a joy to be in. Before you even think about picking up a drill, let’s walk through a few key considerations to make sure your mirror lands in the perfect spot. These simple steps will help you map out your placement with confidence, ensuring the final result looks intentional and professionally done.
Follow standard height guidelines
A good rule of thumb is to hang your mirror so that its center is at eye level. For most people, this means the middle of the mirror will be somewhere between 57 and 65 inches from the floor. This range provides a comfortable viewing height for the average person, so you won’t be stooping down or standing on your tiptoes. Of course, this is just a starting point. If your family is particularly tall or short, you can adjust the height accordingly. The goal is to make the mirror work for the people who use it every day, so feel free to tweak the standard measurements to fit your household’s needs perfectly.
Center the mirror over your vanity
For a clean and balanced look, your mirror should be centered over your vanity and sink. This creates a pleasing sense of symmetry and makes the vanity area feel like a cohesive focal point. When you’re hanging it, aim to leave a gap of at least a few inches between the bottom of the mirror and the top of your faucet. This not only looks better, but it also helps protect your mirror from water splashes, making it easier to keep clean. If you have a wide vanity with two sinks, you have a couple of great options: you can hang one large mirror that spans both sinks or place two smaller, identical mirrors centered over each one.
Match the mirror size to your space
Proportion is everything when it comes to design, and mirrors are no exception. A mirror that’s too large for a vanity can feel overwhelming, while one that’s too small can look awkward and out of place. As a general guideline, your mirror should be about 2 to 4 inches narrower than your vanity cabinet. This leaves a bit of visual breathing room on either side and creates a tidy, layered look. For example, if your vanity is 36 inches wide, a mirror between 32 and 34 inches wide would be a great fit. This simple rule helps ensure your custom mirror looks like it was made for your space.
Visualize placement with painter’s tape
Want to be absolutely sure you’ll love the placement before you commit? Grab a roll of painter’s tape. This is one of my favorite tricks because it takes all the guesswork out of the process. Measure the dimensions of your mirror and use the tape to create an outline of it on the wall exactly where you plan to hang it. Then, step back and live with it for a day or two. Does the height feel right? Is the size proportionate to the vanity? This simple visualization technique lets you see exactly how the mirror will occupy the space and make any adjustments before a single hole is drilled.
Consider lighting and reflection
A well-placed mirror does more than just show you your reflection; it can transform the light in your room. If you have a window in your bathroom, try placing the mirror on the opposite wall. It will capture the natural light and bounce it around the room, making the entire space feel brighter and more open. Just be mindful of what the mirror will reflect. Avoid placing it directly across from a toilet if you can, and be careful not to position it where it will create a harsh glare from a light fixture or direct sunlight. A little strategic thinking about lighting and reflection can make a huge impact.
Framed vs. Frameless: Adjusting Your Installation Method
The type of mirror you choose, whether it’s a classic framed piece or a sleek frameless design, will guide your installation process. Framed mirrors often rely on visible hardware that complements their style, while frameless mirrors aim for a floating, seamless look. The good news is that you can hang both types yourself with the right tools and a little know-how. The key is to understand the different methods and choose the one that best suits your mirror and your wall. Let’s walk through the specific steps for each style so you can get it right the first time.
How to install a framed mirror
Framed mirrors are typically hung using brackets, screws, or a wire, much like a piece of art. Your first step is to securely attach the mounting hardware to the wall. Use a level to ensure your brackets or clips are perfectly even; no one wants a crooked mirror. Space them correctly to support the mirror’s weight and size. Once the hardware is in place, you can carefully lift and hang the mirror, making sure it settles securely onto the brackets. For heavier, more ornate mirrors, it’s always a good idea to have a partner help you with the lifting.
How to install a frameless mirror
Frameless mirrors offer a clean, modern aesthetic, and their installation methods reflect that. You generally have two options: clips or adhesive. Using clips provides a secure hold while keeping the hardware minimal. You’ll install a set of clips on the bottom to support the mirror’s weight and another set on top to hold it in place. If you want a completely seamless look, a strong mirror-safe adhesive is the way to go. You’ll apply the glue to the back of the mirror in vertical strips, then press it firmly against the wall. This creates a floating effect with no visible hardware.
Know when to use (and not use) adhesive
Adhesive is fantastic for achieving that seamless, hardware-free look with frameless mirrors. However, it’s important to know that it’s a permanent solution. Once that mirror is on the wall, removing it will likely cause some damage to the drywall. If you think you might want to change the mirror or redecorate in the future, clips are a much better option. For framed mirrors, especially heavier ones, you should always use brackets or clips. Adhesive isn’t designed to support the combined weight of a heavy mirror and frame, so stick with the hardware that provides a secure mount.
How to Find Wall Studs (and When to Use Anchors)
Before you can hang your mirror, you need a secure place to mount it. Your home’s walls are supported by a hidden wooden frame made of vertical beams called studs. Whenever possible, you want to drill directly into these studs. They provide the strongest possible support, ensuring your mirror stays put for years to come. But what if your ideal mirror spot is on a hollow section of drywall? Don’t worry, that’s where wall anchors come in. Let’s walk through how to find those studs and what to do when you can’t.
Use a stud finder
The most reliable way to locate a stud is with an electronic stud finder. This handy little tool is a must-have for any DIY project. You simply slide it horizontally across the wall, and it will beep or light up when it detects the dense wood of a stud behind the drywall. Once you get a signal, mark the spot with a pencil. I recommend marking both edges of the stud so you can find the center for drilling. A basic stud finder is an inexpensive tool that provides a lot of confidence and prevents you from turning your wall into swiss cheese with unnecessary holes. It’s a small price to pay for getting your installation right the first time.
Try the “knock test”
If you don’t have a stud finder on hand, you can always try the classic “knock test.” Make a fist and gently tap along the wall. As you move, listen closely to the sound. A hollow, open sound means you’re tapping on empty drywall, but when the sound changes to a dull, solid thud, you’ve likely found a stud. This method isn’t as precise, but it’s a great trick to know. You can also look for clues like outlets and light switches, as they are typically mounted to the side of a stud. This can give you a good starting point for where to start knocking.
Choose the right wall anchors for your mirror
If your mounting holes don’t line up with a stud, you absolutely must use wall anchors. Drilling a screw directly into drywall without an anchor won’t hold any significant weight, and your mirror will eventually fall. For lighter mirrors (under 20 pounds), a simple plastic sleeve anchor might be enough. However, for heavier pieces, you’ll need something more robust. I always recommend heavy-duty toggle bolts or molly bolts for mirrors. These types of wall anchors expand behind the drywall, creating a very secure hold that can support much more weight. Always check the weight of your mirror and the anchor’s weight rating on the package before you buy.
Check for wires before you drill
This is a safety step you can’t afford to skip. Before you drill any holes, it’s critical to check for hidden electrical wires or plumbing pipes. Accidentally drilling into a wire can cause a dangerous electrical shock or a fire, while hitting a pipe can lead to a messy and expensive leak. Many modern stud finders also include a feature that detects live AC wiring. It’s also a good rule of thumb to avoid drilling directly above or below light switches and electrical outlets, as wires often run vertically from these fixtures. Taking a few extra seconds to check what’s behind your wall can save you from a major headache down the road.
How to Mount a Mirror on Different Wall Types
The wall you’re working with is the single most important factor in choosing your mounting method. Drywall, tile, and concrete each have their own rules, and using the wrong hardware can lead to a mirror that’s insecure or, even worse, a pile of broken glass on your floor. Getting this part right is the foundation of a successful installation. Before you drill a single hole, take a moment to identify your wall type. A simple knock can often tell you if you’re dealing with hollow drywall or solid brick.
Once you know what you’re up against, you can gather the right tools and hardware for a secure and lasting fit. While hanging a mirror might seem straightforward, the material of your wall completely changes the game. What works for one surface will fail on another. We’ll walk through the most common wall types you’ll find in homes and how to approach each one with confidence. For a truly seamless look, especially with large or custom mirrors, our team at Sea of Glass and Mirrors has the expertise to handle any surface, ensuring a perfect and safe custom mirror installation.
Mounting on drywall
Drywall is the most common interior wall material, but it’s also soft and can’t support much weight on its own. Simply driving a screw into it is a recipe for disaster. Your first goal should always be to locate a wall stud, which provides a solid wood anchor for your hardware. If a stud isn’t available where you want to hang your mirror, you’ll need to use wall anchors. For lighter mirrors (under 20 pounds), a simple plastic anchor might do the trick. For anything heavier, you’ll want to use strong toggle bolts or molly bolts that expand behind the drywall for a much more secure grip.
Mounting on tile
Hanging a mirror on a tiled wall, like in a bathroom, requires a different approach. While you can drill through tile with a special diamond-tipped bit, it’s risky and can easily lead to cracks. A safer and often easier method is to use a strong, mirror-safe adhesive. This type of glue is specifically formulated to bond to the mirror’s backing without eating away at the silvering. It’s an excellent choice for frameless mirrors and can help compensate for slightly uneven tile surfaces. Just be sure to clean the tile thoroughly before applying the adhesive to ensure a strong, permanent bond. For heavy mirrors, a combination of adhesive and mechanical fasteners is the safest bet.
Mounting on concrete or brick
Concrete and brick walls are incredibly sturdy, but they require some muscle and the right equipment. You’ll need a hammer drill and a masonry bit to create your pilot holes. Regular screws won’t work here; you must use masonry screws or anchors designed to expand and grip the inside of the hole. This creates an incredibly strong hold capable of supporting even the heaviest mirrors. Don’t be tempted to use plastic anchors, as they aren’t strong enough for this type of material. When working with these tough surfaces, taking your time and using the correct hardware is essential for a safe installation.
Your Step-by-Step Installation Guide
Alright, you’ve picked the perfect mirror and you’re ready to get it on the wall. This is where the real fun begins! Taking the time to hang your mirror correctly not only keeps it secure but also ensures it looks professionally installed. Just follow these steps, and you’ll have your new mirror up in no time. Grab your tools, maybe a friend to help, and let’s get this project done.
Step 1: Measure and mark the wall
First things first, let’s figure out exactly where your mirror will live. Start by measuring the width of your vanity and use a pencil to lightly mark the vertical center point on the wall above it. Next, decide on the height. A good rule of thumb is to hang the mirror so the bottom edge is a few inches above the faucet. Some people prefer to set it about eight inches above the backsplash, especially if there are outlets or light switches to work around. Once you’ve decided on the placement, mark where the top and bottom of the mirror will be. This complete guide can help you visualize the final placement.
Step 2: Find studs or mark anchor points
To make sure your mirror stays put, you need to anchor it to something solid. The best-case scenario is securing it directly to a wall stud. Use a stud finder to see if any of your mounting holes line up with a stud behind the drywall. If you find one, you’re golden! If not, don’t worry, that’s what drywall anchors are for. Just make sure you choose anchors that are rated to hold more than your mirror’s weight. You can usually find the weight on the mirror’s packaging or the product page online. These professional installation tips explain why finding a stud or using the right anchor is so important.
Step 3: Drill pilot holes and add anchors
Now that you know where your mounting hardware will go, it’s time to drill. If you’re drilling into a stud, a small pilot hole will make it easier to drive the screw. If you’re using drywall anchors, you’ll need to drill a hole that’s the right size for the anchor. A 3/16-inch drill bit is a common size for many plastic anchors. After drilling, gently tap the plastic anchor into the hole with a hammer until it’s flush with the wall. If you’re using heavy-duty metal anchors, you can simply screw them into the wall. This video shows an easy way to hang a mirror and get the anchors just right.
Step 4: Attach the mounting hardware
With your anchors in place, you can now attach the mounting hardware, whether it’s clips, brackets, or a French cleat system. Screw the bottom clips or bracket into the wall at your marked locations. Before you tighten the screws all the way, place your level on top of the bracket to make sure it’s perfectly straight. A crooked bracket means a crooked mirror, and nobody wants that. Once you’ve confirmed it’s level, tighten the screws securely. Then, you can install the top or side clips, leaving them loose enough to slide the mirror into place.
Step 5: Hang the mirror
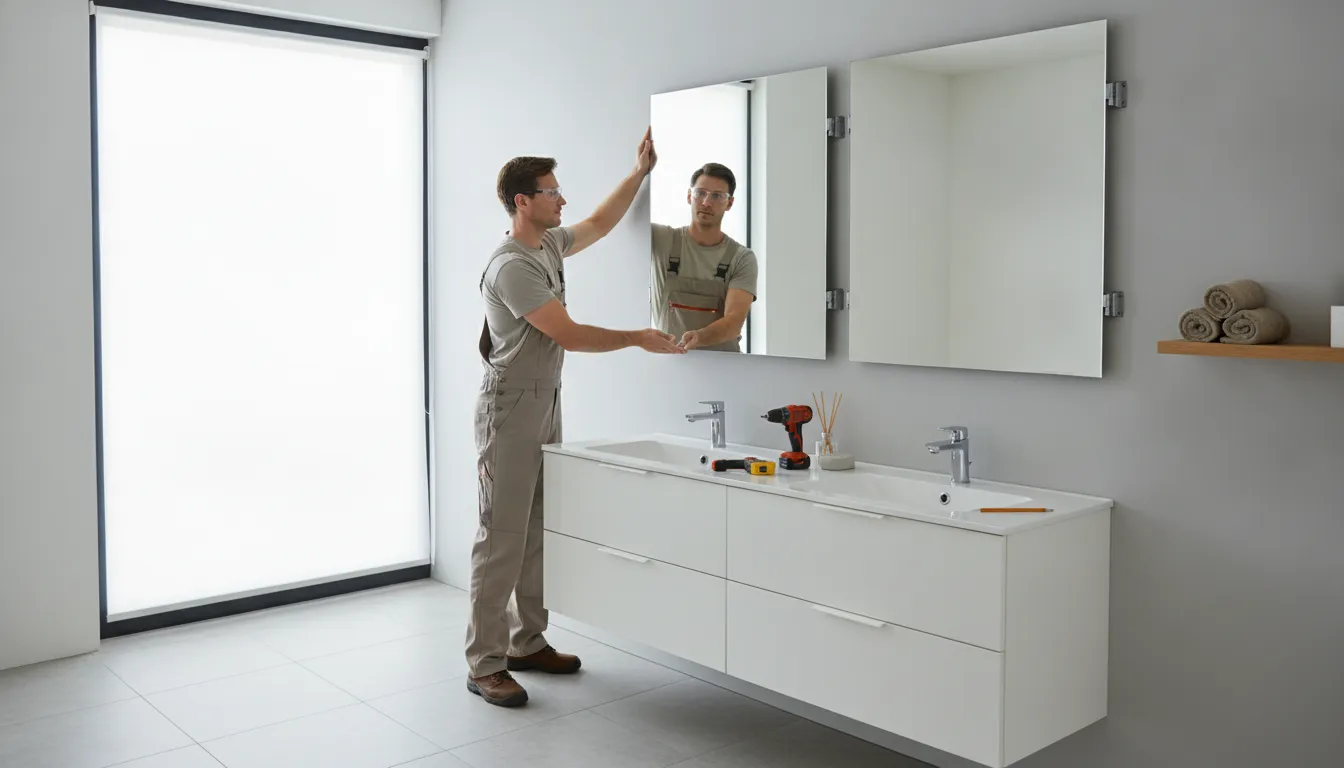
This is a two-person job, so grab your helper. Heavy glass and awkward angles are not a great solo combination. Carefully lift the mirror and rest the bottom edge in the lower clips or bracket you installed. Then, tilt the mirror flat against the wall and secure it with the top or side clips. If you’re using a wire or D-rings, have your partner guide you as you carefully lower the mirror onto the hooks. Take your time with this step to avoid any accidental bumps or scratches. Having a helper to lift the mirror makes the process much safer and easier.
Step 6: Level and make final adjustments
You’re almost there! With the mirror on the wall, do one last check with your level. Place it on top of the mirror to confirm everything is perfectly aligned. If it’s slightly off, you can often make small adjustments without taking it down completely. Once you’re happy with the placement, tighten any remaining screws on your clips or brackets to lock the mirror in place. Give it a gentle wiggle to make sure it feels solid and secure. Now, step back and admire your work. You did it
Common Installation Mistakes to Avoid
You’ve picked out the perfect mirror, and you’re ready to get it on the wall. I get it, the final step is exciting! But rushing through the installation can lead to a crooked mirror, damaged walls, or worse, a broken mirror. After more than a decade of working with glass and home projects, I’ve seen a few things go wrong that are easily preventable. Let’s walk through some of the most common installation mistakes so you can get a professional-looking result that lasts. Taking a few extra minutes to get these details right will save you a major headache later.
Forgetting to level the mirror
This might sound obvious, but you’d be surprised how often it happens. Hanging a mirror without using a level is a recipe for a slightly-off-kilter look that will bug you every time you see it. Your eyes are great at spotting when something isn’t perfectly straight, especially in a room with lots of linear elements like tile and countertops. Before you make any permanent holes, place your level on top of the mirror or your guideline mark. Adjust until the bubble is perfectly centered. It’s a simple step that makes all the difference between a DIY project and a professional installation.
Using the wrong anchors (or none at all)
Screwing directly into drywall is not enough to support the weight of most mirrors. Drywall is brittle and can easily crumble, causing your mirror to come crashing down. You must use wall anchors to give the screw something substantial to grip. It’s also crucial to choose the right wall anchors for the job; a small plastic anchor that works for a picture frame won’t be sufficient for a heavy, frameless mirror. Always check the weight rating on the anchor packaging and, whenever possible, try to secure at least one mounting point directly into a wall stud for maximum support.
Hanging it too high or too low
Where you position your mirror affects both its function and the room’s overall aesthetic. A common mistake is hanging it too high or too low, making it awkward to use. A good rule of thumb is to position the mirror so its center is between 57 and 65 inches from the floor. This standard height for hanging mirrors ensures that people of varying heights can see themselves comfortably. Before you drill, have someone hold the mirror against the wall while you step back to check the placement. It should feel centered and balanced over your vanity.
Using the wrong kind of adhesive
If your installation involves adhesive, please don’t just grab any old glue from your junk drawer. Many common adhesives contain solvents that can eat away at the silver backing of the mirror over time, causing ugly black spots to appear. This process, called desilvering, is irreversible. To avoid this, you must use an adhesive specifically formulated for mirrors, often called mirror mastic. This type of glue for mirrors is designed to create a strong bond without damaging the reflective coating, ensuring your mirror stays beautiful for years to come.
Trusting tape with a heavy mirror
While double-sided mounting tape can be useful for holding a mirror in place temporarily while the adhesive cures, it should never be the only thing supporting its weight. Relying solely on tape, especially for a large or heavy mirror, is incredibly risky. Over time, changes in temperature and humidity in a bathroom can weaken the tape’s bond. For a secure installation, always use mechanical fasteners like clips or J-channels, and make sure they are anchored properly into the wall or, ideally, into a stud. Think of tape as a helper, not the hero of your installation.
Stay Safe: Key Installation Tips
Installing a new mirror is one of the fastest ways to transform a bathroom, but let’s be honest, handling a large sheet of glass can be intimidating. Safety should always be your top priority. A broken mirror isn’t just a mess; it’s a genuine safety hazard and a frustrating setback for your project. Before you lift that mirror, take a moment to review these essential safety tips. Following these simple steps will help you prevent accidents, protect your new mirror, and ensure your installation goes smoothly from start to finish. Think of it as a little prep work for a professional-looking result you can be proud of.
Work with a partner
This is not a solo job. Even if you’re strong, mirrors are heavy, awkward, and surprisingly difficult to manage on your own. Grabbing a friend or family member to help is the most important safety step you can take. Your partner can help you lift and place the mirror securely, hold it steady while you mark the wall, and provide an extra set of eyes to make sure everything is level. Trying to do it all by yourself increases the risk of dropping the mirror, injuring yourself, or damaging your wall. So, call in a favor and make it a team effort. It’s safer, easier, and a lot less stressful.
Handle the glass with care
Mirrors are more delicate than they look. Before you even pick it up, take off any rings, watches, or bracelets that could scratch the glass surface or the silver backing. When you do handle the mirror, hold it by the edges and try not to touch the front with your bare hands to avoid smudges. It’s also a good idea to lay a soft blanket or towel on the floor where you plan to lean the mirror before installation. This simple step protects it from getting chipped or scratched on a hard surface. A little bit of careful handling goes a long way in keeping your new mirror looking flawless.
Protect the mirror’s backing
The reflective quality of a mirror comes from a sensitive silver layer on its back. Using the wrong kind of glue can eat away at this backing over time, creating ugly black spots that show through the front. To prevent this, you must use an adhesive specifically made for mirrors. This mirror-safe adhesive is formulated to create a strong bond without causing any chemical damage. Always read the label on your adhesive to confirm it’s safe for mirrors before you apply it. Protecting the backing ensures your mirror stays beautiful and reflective for years to come.
Know When to Call a Professional
Tackling a home project yourself can be incredibly rewarding, but there’s also wisdom in knowing when to pass the torch to a professional. When it comes to hanging a bathroom mirror, calling in an expert isn’t admitting defeat; it’s making a smart choice for your safety and your home. If you find yourself in one of these situations, it’s probably time to make the call.
First, consider the mirror itself. Is it especially large, heavy, or an unusual shape? A heavy mirror requires serious support, often needing to be secured directly into wall studs with strong toggle bolts. If you’re just screwing into drywall, you’re risking a crash. Professionals have the right tools and techniques to ensure a heavy mirror stays put. Plus, they have the extra hands needed to lift and position it safely, preventing accidents and injuries.
Your comfort level with the project is another big factor. If you’re not confident using a stud finder, drilling into your wall, or choosing the right anchors, it’s best to hire someone who is. A mistake could lead to a damaged wall, a broken mirror, or both, which will cost more to fix than the installation itself. For projects that require precision, like custom frameless mirrors or installations on tricky surfaces like tile, a professional team has the expertise to provide a flawless and secure installation. Handing the job over to an expert ensures it’s done right the first time, giving you peace of mind and a beautiful result without the stress.
Frequently Asked Questions
How high should I hang my bathroom mirror? A great starting point is to position the mirror so its center is at eye level, which for most people is between 57 and 65 inches from the floor. Just as important, make sure it’s centered over your vanity for a balanced look. I also recommend leaving at least a few inches of space between the bottom of the mirror and your faucet to prevent water splashes and make cleaning easier.
What do I do if I can’t find a wall stud where I want to hang my mirror? This is a very common situation, so don’t worry. If your ideal spot is on a hollow section of drywall, you must use wall anchors. A screw by itself will not hold the mirror’s weight. For heavier mirrors, I always suggest using robust anchors like toggle bolts or molly bolts, which expand behind the drywall to create a very secure hold. Always check that the anchors you choose are rated to support more than the weight of your mirror.
Can I use adhesive to hang any type of mirror? Adhesive is a great option for frameless mirrors when you want a completely seamless, hardware-free look. However, you should only use a glue that is specifically labeled as mirror-safe mastic, as other types can damage the mirror’s backing. Keep in mind that this is a permanent solution. For framed mirrors, especially heavier ones, you should always rely on mechanical hardware like brackets or clips for a secure mount.
My bathroom wall is tiled. Is it safe to drill into it? Drilling into tile is possible with a special diamond-tipped bit, but it can be risky and you could easily crack a tile. A safer and often simpler method for tiled walls is to use a strong, mirror-safe adhesive. This creates a very secure bond without any drilling. Just be sure to clean the tile surface thoroughly before applying the glue to ensure it adheres properly.
What’s the single most common mistake people make when hanging a mirror? The most critical mistake is failing to provide proper support. This usually happens in one of two ways: either by skipping wall anchors and drilling directly into hollow drywall, or by using anchors that aren’t strong enough for the mirror’s weight. Either mistake can lead to the mirror falling. Always locate a stud if you can, and if you can’t, use the correct heavy-duty anchors for the job.