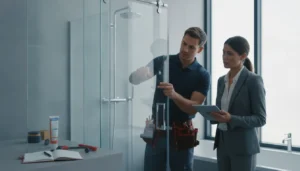
A frameless shower door can make a bathroom feel brighter, larger, and more refined. Without bulky metal framing, clear glass keeps decorative tile, stonework, and custom fixtures in view. Still, the finished appearance depends on what happens before installation day. Walls must provide enough support for heavy glass. The curb must slope toward the drain. Hardware needs to match the glass thickness, and every hole must be measured before fabrication. Professional frameless shower door installation brings these details together while reducing the risk of damage to tile, glass, and surrounding surfaces. Here is what to know before choosing an enclosure for your Florida property.
Key Takeaways
- Assess the shower before selecting a door: Check wall support, finished dimensions, curb slope, plumbing locations, door clearance, and the enclosure style that best suits the space.
- Treat measurement and installation as precision work: Use accurate field measurements, compatible hardware, proper anchors, protective equipment, and trained assistance when handling heavy tempered glass.
- Protect performance with correct sealing and care: Apply approved silicone only where specified, keep drainage paths open, allow full curing time, and inspect sweeps, seals, hinges, and panels regularly.
Why Install a Frameless Shower Door?
A frameless shower door creates a clean, open look by replacing bulky metal framing with thick tempered glass, discreet hinges, clips, seals, and silicone joints. Because the glass has fewer visual barriers, it can make a bathroom feel brighter and more spacious while keeping tile, stonework, and other design details visible.
The right enclosure depends on more than appearance. Before selecting a door, consider the shower’s layout, wall support, curb slope, available clearance, and daily maintenance needs. Accurate measurements and proper installation also help prevent alignment problems and leaks. Glass Rescue offers custom glass shower door services for residential and commercial properties in Dade County, Broward County, Hillsborough County, Hollywood, and Tampa.
Open up the bathroom
Clear glass creates an uninterrupted sightline into the shower, which can make the room appear larger and less enclosed. This effect is particularly useful in smaller bathrooms, where heavy frames and tracks may make the space feel crowded. A frameless design also keeps decorative tile, recessed niches, stone surfaces, and custom fixtures on display.
Depending on the layout, a frameless door may provide a wider entry than some framed designs. That extra opening can make getting in and out more comfortable, although the door still needs enough room to swing without striking a vanity, toilet, wall, or nearby person.
Several configurations may work, including pivot doors, inline enclosures, corner doors, and fixed return panels. The best option depends on the bathroom’s dimensions and the location of the showerhead. A professional shower door consultation can help you choose a layout before custom glass is fabricated.
Simplify glass and hardware cleaning
Frameless enclosures have fewer channels and tracks where soap scum, hair, and moisture can collect. This simpler design may make routine cleaning more manageable and gives you easier access to hinges, clips, corners, and seals. It also makes it easier to spot water buildup or a damaged seal before a small issue becomes a larger repair.
A few consistent habits help protect the glass and hardware. Use a squeegee after each shower to remove water from the panels, then wipe hinges and other hardware with a soft cloth. Once a week, clean the enclosure with a non-abrasive, pH-neutral product. Avoid abrasive pads, harsh chemicals, and rough tools that can scratch glass or damage the finish.
Good cleaning cannot compensate for poor drainage or incorrect installation. The curb should slope toward the drain, and the bottom sweep should touch the curb lightly without blocking water flow. If water escapes, check the door alignment, sweep, and silicone joints instead of applying additional caulk at random.
Customize the door, panels, and hardware
Frameless shower doors offer plenty of room for customization. You can choose clear glass for maximum openness, textured glass for privacy, or tinted and patterned options for a more distinctive appearance. The enclosure may include a single door, fixed panels, a return panel, an inline configuration, or a corner layout.
Hardware provides another way to coordinate the shower with the rest of the bathroom. Hinges, clips, handles, and support bars are available in finishes such as chrome, brushed nickel, and matte black. Handle size and placement matter as well, since they affect comfort, door clearance, and ease of use.
Every drilled hole and cutout must be included before fabrication. Tempered glass cannot be cut or drilled after it has been manufactured, so an incorrect measurement may require a replacement panel. Glass Rescue’s shower glass installation services can help coordinate the enclosure design, hardware, fabrication, and installation.
Weigh the trade-offs of frameless glass
The clean appearance of frameless glass comes with stricter installation requirements. Large tempered panels can be heavy, and hinges must connect to solid wall support or properly installed blocking. If the backing is weak or the hardware is incorrectly positioned, the door may shift, sag, or place stress on the glass.
Frameless glass can also make water spots, fingerprints, and alignment issues easier to notice. Uneven walls, an out-of-square opening, cracked tile, damaged backing, or an incorrectly sloped curb can create problems with fit and sealing. These conditions should be addressed before the glass is ordered.
An experienced DIYer may be comfortable with measuring and drilling, but glass handling requires planning and assistance. Never carry or position a large panel alone, and do not place glass edges directly on tile, concrete, or other hard surfaces. This frameless shower door installation guide outlines several safety and installation considerations.
Choose framed or semi-frameless when appropriate
Frameless is not the best fit for every shower. A framed or semi-frameless enclosure may provide additional support when the opening is unusually wide, the walls are flexible, or the design requires more structure. These options can also work well when the existing shower was built for a bottom track or a framed door system.
Professional evaluation is recommended when tile is cracked or loose, waterproofing has failed, fiberglass walls flex, or the backing behind the hinges is uncertain. Custom angles, oversized glass, uneven walls, and out-of-square openings also require careful planning. Installing a door in these conditions without correcting the underlying issues can lead to leaks, movement, or hardware failure.
Framed and semi-frameless designs can still look modern. Slim profiles and coordinated finishes provide a polished appearance while adding support where the bathroom needs it. The best choice should balance the room’s structure, available space, appearance, and daily use.
What Tools and Materials Do You Need?
A frameless shower door installation requires more than a drill and a tube of silicone. You need accurate measuring tools, tile-safe drilling equipment, glass-rated handling gear, compatible hardware, and materials designed for a wet environment. Gathering everything before work begins helps prevent damaged tile, incorrect holes, and rushed decisions while handling heavy glass.
The right supplies depend on the door style, glass thickness, wall construction, and enclosure layout. A single door with one fixed panel will need different hardware than a corner enclosure with multiple panels. Review the manufacturer’s specifications before ordering anything, and consider professional shower glass installation if the project involves oversized panels, custom angles, or uncertain wall support.
Gather measuring and layout tools
Start with a quality tape measure, a sharp pencil, painter’s tape, a four-foot level, and a torpedo level. These tools help you record the opening size, check whether the walls are plumb, and confirm that the curb slopes toward the drain. Painter’s tape provides a temporary marking surface on finished tile, so you can identify clip, hinge, and channel locations without writing directly on the wall.
A straightedge can reveal bows or dips, while a combination square helps with corners and hardware alignment. Keep a measurement worksheet nearby and record the opening width at the bottom, middle, and top. Write down each measurement separately. Never assume that opposite walls are parallel or that a visibly attractive opening is perfectly square.
Prepare drills, diamond bits, anchors, and fasteners
You will need a variable-speed drill, tile-safe diamond bits, and fasteners suited to the wall structure. A masonry bit may work for some ceramic tile, but dense porcelain, marble, and granite usually require a compatible diamond bit. A pointed guide or starter hole can help keep the bit from slipping across the surface.
Drill slowly with light, steady pressure. Excessive force can crack the tile or damage waterproofing behind it. Follow the bit manufacturer’s instructions for cooling and drilling speed. Before choosing anchors, identify whether you are drilling into a stud, solid blocking, cement board, drywall, or masonry. When possible, secure hinges and clips to studs or blocking instead of relying only on hollow-wall anchors. Glass Rescue’s shower glass services can help when the wall assembly is difficult to assess.
Select hinges, pivots, clips, channels, and support bars
Choose hardware according to the door’s weight, dimensions, glass thickness, and opening style. Hinges carry the full weight of the moving panel, so they should attach to a stud, solid blocking, or an approved heavy-duty anchor system. Clips support fixed panels, while channels may provide continuous support along a wall, curb, or floor.
Wide or tall panels may also need a support bar to reduce movement. Confirm that every component is made for shower glass and matches the selected glass thickness. Avoid combining unrelated hardware systems, since differences in spacing or fit can create pressure points. Before drilling, review the manufacturer’s maximum panel sizes, fastener spacing, glass clearances, and installation sequence.
Add handles, sweeps, seals, setting blocks, and shims
A frameless enclosure still relies on several small components to operate properly and control water. Choose a handle that matches the glass thickness and includes the correct washers or gaskets. A door sweep should attach securely to the bottom edge and lightly contact the curb without dragging. Depending on the layout, you may also need vertical seals where the door meets a wall or fixed panel.
Nylon shims and setting blocks prevent the glass edges from resting directly on tile, stone, or metal. They also help maintain a consistent gap while you align the panels. Use only components approved for the enclosure. Missing gaskets, poorly fitted seals, or incorrect shims can lead to rattling, movement, and leaks even when the door appears level.
Keep neutral-cure silicone and cleaning supplies ready
Use compatible, mold-resistant, neutral-cure bathroom silicone for the joints approved by the manufacturer. Neutral-cure silicone is generally suitable around glass, metal finishes, tile, and stone, but you should still confirm compatibility with every surface before applying it. Do not substitute household caulk simply because it is readily available.
Keep the recommended surface cleaner, rubbing alcohol if approved, lint-free cloths, a plastic scraper, painter’s tape, and disposable gloves nearby. Each joint must be clean and completely dry before sealing. Avoid cleaners that leave behind wax, oil, or soap residue. For help selecting a glass enclosure and installation approach, review Glass Rescue’s residential and commercial services.
Use glass-rated suction cups and protective equipment
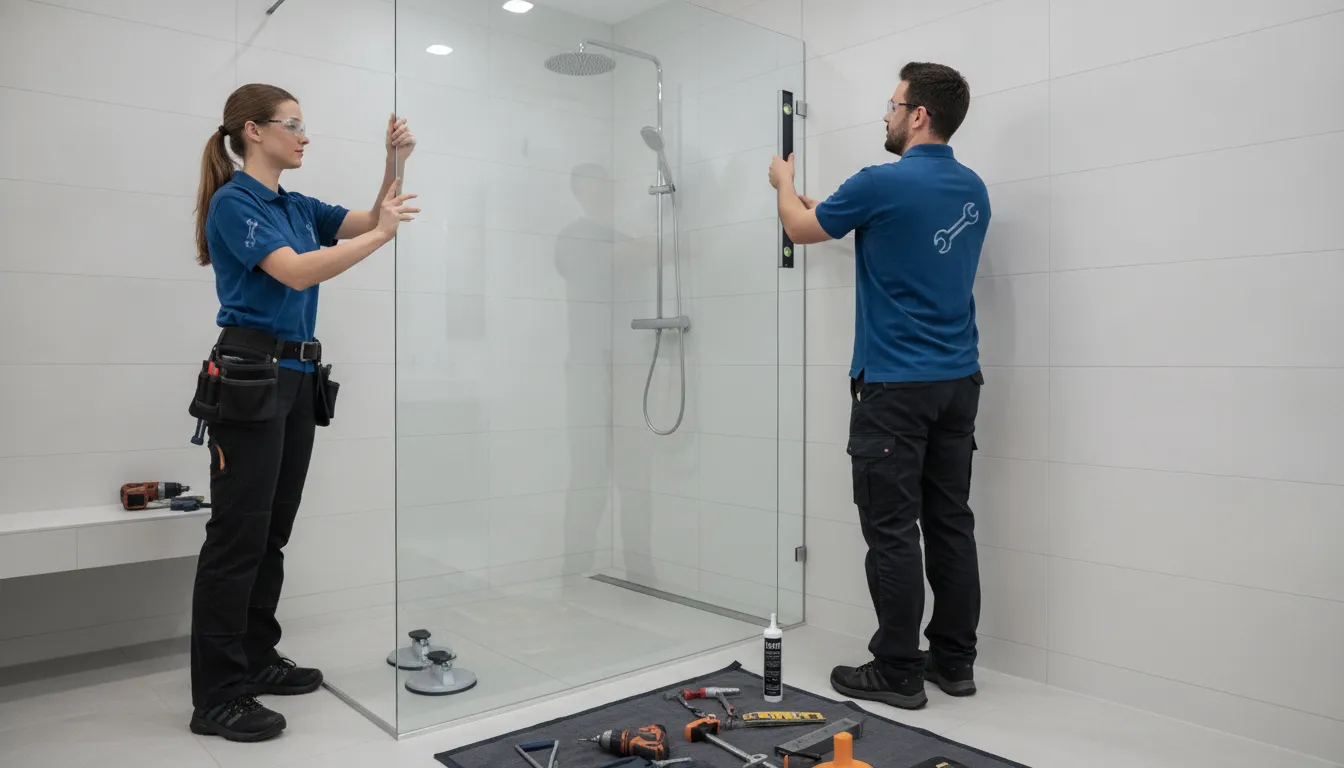
Tempered glass panels are heavy, awkward, and especially vulnerable along their edges. Use glass-rated suction cups with handles designed for the panel’s size and weight. Inspect the cups before use, clean the glass surface, and confirm that each cup has a secure grip. Carry panels upright, never flat and never by a single corner.
Wear cut-resistant gloves, eye protection, sturdy shoes, and long sleeves. Keep children, pets, and unnecessary tools away from the work area. Large panels should be handled by at least two people. Oversized glass or difficult access points may require a professional glass-handling team. Never place a glass edge directly on concrete, tile, or another hard surface. Even a minor impact can damage the panel.
Order tempered glass pre-cut and pre-drilled
Frameless shower doors generally use tempered safety glass that is cut, polished, and drilled before tempering. Once glass has been tempered, it cannot be safely cut or drilled at the job site. This makes accurate measurements and complete hardware specifications essential before production begins.
Provide the fabricator with verified dimensions, glass thickness, edgework requirements, panel shapes, corner details, and the exact locations of holes for hinges, handles, and support bars. Wait until the tile, grout, curb, and wall finishes are complete before taking final measurements. Review the fabrication drawing carefully before approving it. If you are unsure about any dimension, arrange a professional field measure through Glass Rescue’s contact team before ordering custom glass.
Decide when to skip the bottom track
Many frameless shower doors can be installed without a bulky bottom track. Hinges, clips, a properly built curb, and a correctly fitted sweep may provide the needed support and water control. A trackless design also creates a cleaner appearance and makes the shower floor easier to clean.
However, do not remove a track or channel when the manufacturer requires one. A bottom track may be necessary for sliding doors, flexible wall conditions, or systems that need additional stability. Professional assessment is especially important when walls are uneven, tile is cracked, backing is damaged, fiberglass flexes, the opening has custom angles, or the hinges lack solid support. These conditions can make a trackless installation unsafe and increase the risk of glass damage or leaks.
How Do You Measure for Installation?
Measuring for a frameless shower door requires more than checking the width of an empty opening. Frameless glass is made to fit the finished shower, so tile thickness, grout lines, curb slope, wall angles, and hardware dimensions all affect the final design. Measure only after the tile, grout, curb, threshold, and other finish materials are complete. Taking measurements too early can result in glass that no longer matches the shower.
Gather a quality tape measure, a long level, a straightedge, a framing square, and a pencil. Record each measurement clearly, including its exact location. A simple sketch and a few photos can help your glass installer understand the space. Since tempered glass cannot be cut or drilled after fabrication, precise measurements are essential. The National Glass Association’s safety glazing guidance explains the importance of using safety glazing in doors and other hazardous locations.
If the walls are uneven, the curb is damaged, or you are unsure where hinges and panels should go, arrange a professional field measurement before ordering custom glass.
Measure after finishing tile, grout, and the curb
Wait until all tile, grout, waterproofing details, and curb finishes are complete before measuring. These materials determine the shower’s finished dimensions, and even a small change can affect the fit of a frameless door. Measurements taken from unfinished backer board or framing may not match the final opening.
Clean away dust and construction debris first. Measure from the finished tile surface, not from the framing behind the wall. Confirm that the curb cap, stone, tile, or threshold is securely installed. If trim or caulk remains unfinished, ask your installer whether it should be completed before the field measurement. The goal is to measure the exact surfaces that will support or surround the glass, not an earlier stage of construction.
Record the opening width at the bottom, middle, and top
Measure the opening width in at least three locations: near the curb, at the middle, and near the top. Keep the tape level and hold it against the finished surfaces on both sides. Write down each reading rather than assuming the opening has the same width from top to bottom.
If the layout includes a fixed panel, return panel, corner, or angled wall, measure each section separately. Mark where the door will sit and where each panel will begin or end. Differences between the readings can reveal bowed or leaning walls. Do not average those measurements into one number. The variations help your glass professional determine the appropriate panel shape and glass gaps. Include the measurement location on your notes so there is no confusion later.
Check height, wall plumb, level, and square
Measure the finished height from the top of the curb to the planned top of the glass. Take readings at both sides of the opening and, when possible, near the center. Differences may indicate that the curb, ceiling line, or adjacent walls are not level.
Use a long level to check whether each wall is plumb. A leaning wall can affect the door’s alignment, closing action, and required glass shape. Place a straightedge against the tile to identify bows or dips, then use a framing square to check the corners. If the enclosure is out of square, do not hide the issue by recording a single simplified measurement. Share the actual readings with your installer so the glass can be designed for the opening.
Measure to the nearest 1/16 inch without averaging uneven walls
Record each measurement to the nearest 1/16 inch and label it carefully. Note whether the number refers to the left side, right side, bottom, top, curb, or wall. Clear notes are especially important when the shower includes several panels or multiple hardware locations.
Do not round measurements too soon or average readings from uneven walls. Custom fabrication depends on the actual conditions at the site. If the opening narrows from top to bottom, record both dimensions and describe the difference. Your installer may need to account for the variation with a tapered panel, a different glass layout, an adjustment piece, or a revised enclosure design. When in doubt, measure again and include a photo of the area with your notes.
Confirm the curb slopes toward the drain
The finished curb should direct water into the shower instead of toward the bathroom floor. Place a level across the curb and confirm that the surface slopes toward the drain. The required slope should follow the shower system and applicable local requirements. A commonly used reference is approximately 1/4 inch per foot.
Check the slope in more than one location, particularly on a long curb or a curb with a corner. A poorly sloped curb can create an uneven door gap, cause the door to rub, or let water escape. If the curb is level, slopes outward, or contains dips, repair it before ordering glass. Extra silicone cannot correct a structural slope problem. A properly prepared curb gives the door sweep a consistent surface and helps the enclosure control water.
Plan the door swing, showerhead clearance, and bathroom access
Decide whether the door will swing inward, outward, or in both directions before final measurements are taken. Check that it can open without hitting a toilet, vanity, wall, towel bar, or another glass panel. The entry should also remain comfortable and unobstructed.
Review the locations of the showerhead, controls, shelves, and other fixtures. An inward-swinging door should not interfere with the controls, while an outward swing should not send water into the rest of the bathroom. Consider how much space users need to enter and exit safely. For commercial or public projects, review the Americans with Disabilities Act standards and applicable local requirements. Residential installations may follow different rules, but comfortable access and safe operation still matter.
Locate studs, blocking, pipes, and electrical lines
Identify the framing behind the finished wall before marking hinge, clip, or support-bar locations. Hinges and heavy fixed panels need secure attachment to studs or properly installed blocking. Tile, drywall, or an unsupported surface alone may not provide enough strength for the hardware.
Review construction photos or building plans if they are available. A stud finder can help, but do not rely on one tool to identify every utility. Check for plumbing and electrical lines before drilling, especially around shower controls and wall-mounted fixtures. Never drill until you understand what is behind the tile. If solid backing is missing from a planned hinge location, ask a qualified contractor or glass installer whether reinforcement is possible before ordering the panels.
Allow for hinges, glass gaps, and hardware clearances
Frameless glass needs carefully planned gaps around the curb, walls, and adjacent panels. These spaces allow the door to move freely and give the installer room to account for small variations in the opening. The correct gap depends on the glass thickness, hinge style, sweep, seal, and hardware manufacturer’s specifications.
Mark the planned hinge locations and confirm that the door can open fully. Check that the handle will not strike a wall, panel, or fixture. Also make sure clips, channels, and support bars will fit without conflicting with grout lines or tile edges. Do not estimate clearances from a product photo. Use the dimensions supplied with the hardware, or ask your installer to include those measurements in the layout drawing.
Verify measurements before ordering custom glass
Review the complete measurement sheet before ordering. Compare the width, height, wall conditions, curb slope, panel arrangement, door swing, hinge side, handle position, and hardware finish. Confirm that the drawing reflects the actual shower, including any return panel, corner, notch, angled section, or support bar.
Ask another person to compare the notes with the opening. If a number seems inconsistent, measure it again instead of guessing. Send photos and a simple dimensioned sketch to the fabricator or installer. Glass Rescue offers custom glass services for residential and commercial projects across Dade, Broward, Hillsborough, Hollywood, and Tampa. A professional review can identify problems before fabrication. After the final measurements are approved, do not change the tile, curb, or wall layout without confirming that the glass design still fits.
How Do You Prepare for Installation?
A frameless shower door installation starts before the first hole is drilled. Careful preparation protects the glass, limits the risk of water damage, and helps the finished door open, close, and seal correctly. It also gives you time to identify problems that could affect the design or make the work unsafe.
Inspect the shower, confirm the layout, gather compatible materials, and plan how each panel will be moved. Complete repairs before ordering custom glass, since tempered glass cannot be cut or drilled after fabrication. For help planning your project, review Glass Rescue’s shower glass services.
Inspect waterproofing, tile, and the shower curb
Inspect the shower from top to bottom before planning the door. Look for damp drywall, staining, soft areas, musty odors, or water collecting outside the enclosure. These signs may indicate a waterproofing problem behind the tile. A frameless door will not correct a leak beneath the surface, so address water intrusion before installation begins.
Check that the tile is firmly attached and that grout joints are complete. Examine the curb for cracks, movement, and a slope toward the drain. Water should flow into the shower instead of collecting beneath the door or against the bathroom floor. If the curb slopes the wrong way, the door may not seal properly. Resolve these issues before field measuring or ordering custom glass.
Repair loose tile, damaged grout, or unsupported walls
Repair loose tile, cracked grout, and damaged backer board before attaching hardware. Hinges, clips, and channels need a stable mounting surface, and tile alone may not provide enough support for a heavy glass door. If the wall flexes when pressed, the framing may need additional blocking or a different mounting approach.
Check whether the walls are plumb and the opening is square. Minor variations can often be addressed during measurement, but substantial movement, damaged framing, or badly leaning walls may require construction work. Do not compensate for a weak wall by simply tightening the hardware. Have a qualified contractor or glass installer assess the area and complete structural or tile repairs before fabrication.
Choose the glass thickness, door style, and hardware finish
Choose glass thickness and door style according to the opening, panel size, hardware requirements, and bathroom layout. Options may include a single hinged door, an inline door with fixed panels, a corner enclosure, or a door with a return panel. Larger or more complex designs may require a support bar or header.
Coordinate the hardware finish with the faucet, shower trim, towel bars, and cabinet hardware. Chrome, brushed nickel, matte black, and brass are common choices, though availability varies by manufacturer. Confirm that the hinges, clips, seals, and handle are compatible with the selected glass thickness. Ask for product specifications before ordering, especially when combining components from different suppliers.
Plan inline doors, return panels, fixed panels, and corners
Create a simple drawing of the enclosure and label every panel. Mark the door location, hinge side, swing direction, fixed panels, return panels, and corners. This plan helps confirm that the door will not strike a vanity, toilet, towel bar, nearby wall, or another fixture when opened.
Consider how each panel will be supported and where the hardware will attach. A corner enclosure may require clips on two walls, while a wide fixed panel may need a support bar or another approved stabilizing method. Account for showerhead placement, control locations, cleaning access, and bathroom entry. Review the final layout with your installer before fabrication. Glass Rescue’s custom glass services can help match the enclosure design to the space.
Confirm tempered safety glass and manufacturer specifications
Use glass designed for shower enclosures and confirm that each panel meets applicable safety requirements. Shower doors commonly use tempered safety glass, which is manufactured to withstand greater thermal stress than ordinary glass. Even so, tempered glass can break if an edge is struck or if the panel is installed under pressure.
Review the fabrication details before installation, including thickness, dimensions, cutouts, holes, polished edges, and hinge or clip locations. Tempered glass cannot be cut or drilled after fabrication. Follow the glass and hardware manufacturer’s instructions for clearances, fasteners, support, and cleaning products. If you are unsure whether the components work together, pause the project and ask a qualified installer to verify the specifications.
Check building, safety, and accessibility requirements
Review local requirements before work begins, particularly for a new bathroom, major remodel, or commercial property. Requirements may address safety glazing, door clearances, accessible routes, hardware, and swing direction. The International Code Council’s safety glazing information offers useful background, but local building departments may apply additional requirements.
Prepare the work area so children, pets, and other household members stay clear while glass is moved or drilled. Wear eye protection, suitable gloves, and sturdy footwear. Never handle a large panel alone. Tempered glass can be heavy and difficult to control, so arrange enough trained help before delivery and installation day. For commercial or accessible bathrooms, confirm the layout with the appropriate professional before ordering glass.
Protect floors, tile, walls, and glass edges
Clear the bathroom and cover nearby surfaces before bringing in the glass. Use moving blankets, clean cardboard, or protective floor covering, and make sure it cannot shift underfoot. Protect finished walls and tile from drill dust, tools, ladders, and loose hardware.
Glass edges require particular care because they are more vulnerable than the broad face of the panel. Keep each panel upright on a stable, padded surface, and never lean it against an unprotected corner. Do not place glass directly on concrete, tile, stone, or another hard surface. Use approved setting blocks or padded supports, and keep tools, clamps, and suction cups away from the edges unless they are designed for glass handling.
Inventory every panel, fastener, seal, and hardware component
Compare the delivery with the approved drawing or order before installation. Count every panel and confirm its label, dimensions, door orientation, hole locations, and polished edges. Inspect the glass for chips, scratches, cracks, or other damage before moving it into the shower.
Use a checklist for hinges, handles, clips, channels, support bars, anchors, screws, washers, setting blocks, shims, sweeps, seals, and silicone. Confirm that fasteners match the wall construction and that seals fit the selected glass thickness. Store small parts in labeled containers to prevent mix-ups. If anything is missing or damaged, contact the supplier before drilling or hanging a panel. Taking care of these details early can prevent delays once installation starts.
Arrange help or hire a professional glass-handling team
Large shower panels typically require at least two people to carry, position, and secure safely. Arrange help from people who understand how to lift and support glass, or hire a professional team experienced with custom shower enclosures. Suction cups can improve control, but they do not replace proper lifting technique or adequate support.
Professional assistance is particularly valuable when the opening has uneven walls, oversized panels, tight access, fragile tile, or complicated corners. An experienced installer can verify site conditions, protect the bathroom, select suitable anchors, and make adjustments without placing harmful stress on the glass. Glass Rescue offers residential and commercial glass installation across Dade, Broward, and Hillsborough counties. You can contact Glass Rescue to discuss your shower layout and installation requirements before work begins.
How Do You Install a Frameless Shower Door?
Installing a frameless shower door requires accurate measurements, careful glass handling, and a stable mounting surface. The glass may be tempered for safety, but its edges remain vulnerable to impact. A panel that strikes tile, concrete, or metal can chip or shatter, so never move large pieces alone or rest them directly on a hard surface.
The installation sequence also depends on the enclosure design. An inline door, corner enclosure, return panel, and fixed panel may each require different hardware and clearances. Use the manufacturer’s instructions for hole sizes, fasteners, hinge placement, and sealing. If you need custom glass, complex hardware, or help with a heavy enclosure, review Glass Rescue’s shower enclosure services before beginning.
1. Inspect the glass and hardware
Compare each glass panel with the approved measurements and layout before moving it. Check the width, height, edge polish, cutouts, notches, and drilled holes. Look closely for chips, cracks, scratches, or damage around the edges. Do not install damaged glass, and contact the supplier if the panel does not match the order.
Next, organize the hinges, clips, channels, handles, sweeps, seals, anchors, screws, gaskets, washers, and setting blocks. Confirm that the hardware matches the glass thickness and enclosure design. Keep protective packaging on the panels until you are ready to install them. Use glass-rated suction cups and arrange enough capable help to control each piece safely.
2. Dry-fit fixed panels and hardware
Place the fixed panels in their planned positions without applying permanent sealant or fully tightening the hardware. Use temporary setting blocks and shims to support the glass while you check how it sits on the curb and against the walls.
Position the channels or clips and check the layout with a level. Confirm that the panels have the correct gaps and that the door will have enough room to swing. Look for contact between the glass and tile, curb, or nearby hardware. If anything appears misaligned, stop and correct the layout before drilling. It is much easier to resolve an issue during a dry fit than after the glass has been secured.
3. Mark clip, hinge, channel, and anchor locations
After confirming the dry fit, mark every location for clips, hinges, channels, and anchors. Painter’s tape can make marks easier to see on tile and may help reduce drill-bit movement. Follow the hardware template rather than estimating hole locations by eye.
Measure each mark again before drilling. Even a small error can leave a hinge out of alignment or place a fastener too close to a tile edge. Check that every anchor will enter solid backing, such as a stud or properly installed blocking. Tile alone may not provide enough support for heavy glass. For a custom layout, a professional glass installation team can verify the mounting plan before fabrication.
4. Check for utilities before drilling
Identify what is behind the wall before drilling any hole. Plumbing, electrical wiring, and other utilities may run near the shower enclosure, especially around plumbing fixtures, corners, and walls shared with another room.
Review construction plans if they are available, inspect the opposite side of the wall, and use an appropriate stud or utility detector. Do not assume the wall is clear because the drilling point is close to the surface. If you cannot confirm the location of pipes or wiring, pause the work and ask a qualified professional to assess it. A misplaced hole can damage plumbing, create an electrical hazard, or compromise the wall assembly.
5. Drill tile slowly with the correct diamond bit
Choose a diamond-rated bit designed for the tile material and the required anchor size. Porcelain, ceramic, stone, and glass tile can respond differently to drilling, so use the bit recommended for the surface. Start at a slow speed and hold the drill steady. Painter’s tape or a suitable guide can help prevent the bit from slipping.
Use cooling as directed by the bit and tool manufacturer, and do not force the drill through the tile. Too much pressure can crack the tile, enlarge the hole, or damage the waterproofing behind it. After passing through the tile, follow the anchor instructions for the wall substrate. Remove dust carefully without chipping the opening or disturbing the surrounding tile.
6. Install anchors, clips, channels, and setting blocks
Clean each drilled hole and install the specified anchor for the wall construction. Never force an anchor into a hole that is too small. Where required, apply a compatible sealant around penetrations exposed to moisture. Position the clips or channels and fasten them with screws suited to the backing.
Install setting blocks wherever the enclosure design calls for them. They help distribute the panel’s weight and keep the glass from touching the curb or tile. Tighten hardware gradually and evenly. Metal must not contact the glass directly, so install every required gasket, bushing, and washer. Stop if a fastener resists or a component does not sit correctly, then check the hole, anchor, and hardware before continuing.
7. Position and secure the fixed panels
Use glass-rated suction cups and enough help to lift each fixed panel. Keep it upright and protect the edges from floors, tools, walls, and the curb. Lower the panel onto the setting blocks and guide it into the clips or channel without dragging it across the tile.
Check the panel with a level from more than one direction. Adjust the shims or setting blocks until it is plumb, stable, and aligned with the enclosure. Tighten the clips gradually, alternating between locations so pressure stays even. Maintain the recommended gaps between the panel, wall, curb, and adjacent glass. Before moving on, confirm that the panel has not twisted as the hardware was tightened.
8. Attach hinges or pivots without overtightening
Install the hinges or pivots with the correct gaskets, washers, and fasteners. The gaskets should separate the metal from the glass around every hole. Align each hinge with the door edge and tighten the fasteners evenly. Follow the manufacturer’s torque guidance when it is provided.
Do not overtighten the hardware. Excessive pressure can stress the glass, damage the gasket, or distort the hinge. Check that each hinge sits square with the fixed panel and moves smoothly. If the hinge does not align, do not force the door or glass into place. Recheck the panel position, hardware orientation, and required gaps before continuing.
9. Lift and hang the door with proper support
Frameless shower doors can be heavy and difficult to control. Use two or more people when needed, along with suction cups rated for the panel’s weight. Carry the glass upright, keep hands clear of pinch points, and protect the bottom and side edges from hard surfaces.
Align the hinge leaves, pivots, or clamps with the fixed hardware before setting the door in place. Support the door with temporary shims or blocks while starting the fasteners. Do not allow the full weight of the panel to hang from partially engaged screws. Keep the door supported until all hardware is seated correctly and tightened according to the manufacturer’s instructions.
10. Align the door and set an even reveal with shims
Adjust the door’s height, side-to-side position, and relationship to the fixed panel while it remains supported. Use shims to create an even reveal along the jamb and between the door and adjacent glass. The gaps must allow the door to open without striking tile, hardware, walls, or other panels.
Check that the door follows the curb’s slope and does not lean in the wrong direction. Open it slowly at several angles and watch for rubbing, binding, drifting, or uneven gaps. Make small adjustments instead of forcing the panel. Proper alignment helps the sweep contact the curb correctly and reduces strain on the hinges during everyday use.
11. Install the handle, sweep, seals, and door stops
Install the handle with its required sleeves, washers, and gaskets. Tighten it enough to prevent movement, but do not compress the glass excessively. Fit the bottom sweep, jamb seals, and magnetic seals according to the enclosure design. Trim each piece cleanly so it meets the corners without bunching.
The bottom sweep should sit straight and make light, consistent contact with the curb. It should guide water back into the shower without dragging heavily. Install door stops where specified to prevent the door from opening too far or contacting nearby glass. Check that every seal is secure and correctly positioned before applying silicone to the approved joints.
12. Test the swing, latch, clearance, and hardware
Open and close the door several times at a controlled pace. Confirm that it swings freely, remains aligned, latches correctly, and clears the curb, walls, fixed panels, handle, and nearby fixtures. The door should not rub, drift, slam, or require excessive force.
Inspect the hinges, clips, handle, seals, and setting blocks for movement. Check that no metal touches the glass and that fasteners are seated evenly. Complete the required sealing and curing process before using the shower. If the door sags, binds, or fails to latch, correct the alignment rather than adding extra force or random caulk. For a site assessment or installation support in South and Central Florida, contact Glass Rescue.
How Do You Seal and Test the Door?
A frameless shower door needs more than precisely positioned glass. The silicone, sweep, seals, and hardware work together to keep water inside the shower and protect the surrounding tile, curb, and walls. Begin sealing only after the fixed panels and door are fully aligned, the hardware is secure, and the door opens and closes without rubbing.
Sealant placement varies by enclosure design. Always follow the hardware manufacturer’s instructions for approved seams, compatible products, and curing times. If your shower includes several panels, unusual angles, a damaged curb, or difficult access, Glass Rescue’s shower door services can help with measuring, installation, sealing, and final testing.
Clean and dry each joint before applying silicone
Silicone bonds best to surfaces that are clean, dry, and free from dust, soap residue, oil, and old caulk. Wipe the glass, tile, curb, and hardware areas with a cleaner that is safe for each surface. Then allow everything to dry completely before applying the sealant. Moisture left inside a joint can weaken the bond and create small openings where water may escape.
Use a lint-free cloth and avoid touching the prepared areas with your fingers. Under good lighting, inspect each joint for debris, chips, or gaps. The surfaces should be sound and close enough together for the silicone to make continuous contact. If a joint is unusually wide, pause the installation and correct the underlying fit instead of trying to fill the space with a thick bead.
Seal only manufacturer-approved exterior seams
Avoid applying silicone to every visible gap around the enclosure. Frameless shower systems often include openings that allow water to drain back into the shower. Sealing the wrong side can trap moisture inside a channel or around a hinge, which may lead to staining, mold, or hardware problems.
Review the instructions for the specific hinges, clips, channels, and seals before caulking. Many installations call for sealant on approved exterior vertical joints and selected curb-to-panel connections, but the correct locations depend on the design. If the instructions are unclear, contact Glass Rescue or ask the hardware manufacturer for guidance. Removing cured silicone from tile or glass can be difficult and may damage the finish.
Seal curb-to-panel and vertical joints correctly
The connection between the fixed panel and the curb receives frequent exposure to water, so it deserves careful attention. Apply a steady, continuous bead along the approved curb-to-panel seam. Keep the nozzle at a consistent angle and pressure so the sealant contacts both surfaces evenly. Avoid stopping midway, because breaks in the bead can form a path for water.
Seal approved vertical joints between the glass and wall or tile with the same care. Do not use a large mound of silicone to hide an uneven panel or an oversized gap. A significant gap may point to a measuring, alignment, or support problem. Correct that issue before sealing. The finished bead should be continuous, neat, and large enough to seal the joint without spreading onto nearby drainage openings.
Keep weep paths and drainage areas open
Some shower door systems include weep paths that guide water away from the glass and back toward the shower drain. These openings must remain clear. Silicone blocking a channel end, hardware opening, or lower drainage route can cause water to collect around the curb or bottom edge of a panel.
Before the sealant cures, inspect the enclosure from several angles. Remove excess silicone from areas designed to drain, using a surface-safe tool and the method recommended by the product manufacturer. Do not add sealant simply because an opening is visible. A clear drainage route is part of the enclosure’s design. Keeping it open also limits standing moisture, which can contribute to mold, staining, and damage to nearby materials.
Use compatible, mold-resistant neutral-cure silicone
Choose a bathroom-grade silicone that is compatible with glass, tile, stone, and the enclosure’s hardware. A mold-resistant, neutral-cure formula is commonly used for shower applications because it is designed for wet areas and produces less odor than some other sealant types. Read the product label and confirm that it is suitable for the surfaces in your bathroom.
Do not substitute construction adhesive, general kitchen caulk, or an unapproved product. The wrong sealant may fail to bond, discolor nearby materials, or react with metal finishes. For commercial bathrooms, specialty tile, or unusual stone, confirm compatibility before installation. You can also review the relevant ASTM C920 sealant standard when comparing product specifications.
Install a sweep that lightly contacts the curb
A door sweep helps direct water back toward the shower without requiring a bulky frame. Cut the sweep to the manufacturer’s specified length, then install it on the bottom edge of the door according to the product instructions. Its flexible edge should make light, even contact with the curb from one side to the other.
A sweep that presses too firmly can make the door difficult to open and place extra stress on the hinges. A sweep that barely touches the curb may allow water to escape. Open and close the door several times after installation. Check that the sweep remains in position, does not fold, and does not drag against the curb. If it rubs, correct the fit rather than forcing the door closed.
Smooth the bead and remove excess sealant
Tool the silicone shortly after applying it, while the bead is still workable. Use a smoothing tool or finishing method recommended for the specific sealant. A smooth bead should fill the joint continuously without spreading over areas that need to remain open. Work carefully around corners, hardware, and the bottom of the fixed panel.
Remove excess sealant with a plastic tool or another surface-safe method. Avoid scraping glass or tile with a sharp blade unless the product and surface instructions specifically allow it. Do not use excessive water or cleaning solution while the silicone is fresh, since that can weaken the surface or spread the sealant. A clean finish makes it easier to identify gaps, breaks, and future wear.
Let the silicone cure before using the shower
Keep the enclosure completely dry for the full curing period listed on the sealant label. Many shower silicones require approximately 24 to 48 hours, but temperature, humidity, ventilation, and bead size can affect the required time. The surface may feel dry while the material underneath is still soft.
Do not spray water on the joints early to see whether they are sealed. Premature testing can disturb the bead and prevent a watertight bond. Keep the bathroom ventilated while the silicone cures, and wait longer if the manufacturer recommends it. If other contractors need to work in the bathroom, protect the enclosure from dust, movement, and accidental contact until the sealant has fully cured.
Test panel joints, the curb, sweep, and hinges for leaks
After the silicone cures, inspect the enclosure before taking a full shower. Confirm that the door opens and closes smoothly, the latch engages, and the sweep maintains light contact with the curb. Then use a gentle stream of water to test one area at a time, starting near the fixed panel and moving toward the door.
Check the curb, panel joints, sweep, hinges, and hardware for moisture on the outside of the enclosure. Avoid directing high-pressure water at the seals, since that does not reflect normal shower use and may force water into areas that are not designed to withstand it. If you find a leak, dry the area, identify its source, and correct the cause before using additional sealant.
Adjust alignment or reseal joints instead of adding random caulk
A leak does not always mean the enclosure needs more silicone. The door may be out of alignment, the sweep may be cut incorrectly, a panel may not sit securely on its setting blocks, or a joint may have been sealed on the wrong side. Adding random caulk can hide the problem and block an essential drainage route.
Check the door reveal, hinge position, curb slope, panel support, and sealant continuity first. If the door rubs, sags, or fails to close, correct the alignment before resealing. Remove failed silicone and prepare the joint properly before applying a new bead. When the cause is unclear, request an inspection from Glass Rescue instead of repeatedly covering the same area.
Maintain the glass, seals, silicone, and hardware
Routine care helps you catch small problems before they lead to water damage. Clean the glass with a nonabrasive product, wipe the sweep and seals, and remove soap buildup from the curb and corners. Avoid abrasive pads, harsh chemicals, and rough tools that can scratch the glass or damage the hardware finish.
Inspect the silicone every few months for gaps, peeling, discoloration, or mold. Check hinge and clip screws for movement, but never overtighten hardware against the glass. Replace worn sweeps and damaged seals promptly. If you notice cracked glass, loose panels, persistent leaks, or hardware that no longer holds alignment, stop using the enclosure and arrange professional service through Glass Rescue.
What Frameless Shower Door Mistakes Should You Avoid?
A frameless shower door can give your bathroom a clean, open appearance, but the installation requires careful planning and precise glass handling. Unlike a framed enclosure, frameless glass depends on accurate measurements, properly positioned hardware, solid wall support, and carefully planned gaps. A small mistake can lead to cracked tile, loose hinges, leaks, or a door that rubs against the curb or fixed panel.
Before ordering custom glass, inspect the entire shower opening and confirm that the tile, grout, curb, and waterproofing are complete. You should also confirm the door swing, glass configuration, hardware finish, and mounting locations. If you are unsure about any part of the project, Glass Rescue provides custom glass services for residential and commercial customers across South and Central Florida.
The following checklist covers the most common installation mistakes. Some tasks, such as measuring and sealing, may seem manageable for an experienced DIYer. Handling large tempered-glass panels, drilling finished tile, and attaching heavy doors to wall framing require considerably more care. If the wall support or waterproofing is uncertain, pause the project and speak with a qualified glass installer before ordering the panels.
Order glass from complete, accurate measurements
Never order custom glass from one quick measurement. Measure the shower opening at the bottom, middle, and top. Record the height on both sides and near the center as well. These measurements can reveal walls or curbs that are uneven, out of plumb, or out of square.
Take measurements only after the tile, grout, curb, and other finish materials are complete. Record each dimension to the nearest 1/16 inch, and do not average measurements when the opening varies. The final glass size must account for wall conditions, hardware, hinges, required gaps, and the direction of the curb slope.
A professional glazier can field-measure the opening and identify conditions that are easy to miss. Accurate measurements reduce fabrication problems and help the finished door operate correctly.
Drill tile with the correct bit and setting
Drilling tile with the wrong bit can chip the surface, crack the tile, or create a hole that cannot hold an anchor securely. Use a tile-rated diamond bit that suits the material. Porcelain, ceramic, natural stone, and glass tile may require different tools and drilling methods.
Mark every hole carefully before drilling. Use low speed and light pressure, and keep the bit cool according to the tool manufacturer’s directions. Do not use hammer mode while the bit is passing through tile. Once you reach the wall material behind the tile, switch to the correct bit and setting for that substrate.
Masking tape can help keep the bit from slipping at the start. Clean away drilling slurry before installing the hardware, and avoid forcing the bit through the finished surface.
Secure hinges and clips to solid wall backing
Frameless shower doors are heavy, and hinges carry repeated loads each time the door opens and closes. Anchoring a hinge or clip only into tile, drywall, or weak mortar can allow the hardware to move. Over time, that movement can stress the glass or damage the finished wall.
Locate studs or installed blocking behind the shower wall before drilling. The anchor type must match the substrate, and each fastener should be sized for the hardware and panel weight. Tile alone is not structural support.
If you cannot confirm the location of framing or blocking, stop before drilling. Glass Rescue can discuss the project and installation conditions through its contact page. It is safer to verify the wall support first than to repair a loose hinge or damaged panel later.
Keep glass edges off tile, concrete, and hard surfaces
Tempered glass is designed to withstand normal use across its broad surface, but its edges are more vulnerable to impact. Setting a panel directly on tile, concrete, a metal threshold, or another hard surface can create a concentrated impact that causes the glass to break.
Use approved setting blocks, padding, and glass-rated suction cups whenever you move or rest a panel. Keep the glass upright and supported instead of laying it flat where it can twist or receive pressure at one corner.
Never drag a panel across the floor. Keep screws, tools, debris, and other hard objects away from the exposed edges. Even a small chip can compromise the panel, so inspect every edge before installation and replace damaged glass rather than trying to conceal the problem with hardware.
Carry heavy panels with suction cups and enough help
Large shower panels can be difficult to control, even when they are not especially wide. A single installer may lose control while turning through a doorway, stepping over a curb, or positioning the panel near a hinge. That creates a serious risk of injury and glass damage.
Use clean, glass-rated suction cups and inspect them before lifting. Most shower panels require at least two people, while tall, thick, or complex enclosures may need additional help. Clear the route first, protect the floor, and decide where each person will stand before lifting the glass.
Wear suitable protective equipment and keep hands away from pinch points. If the panel cannot be carried and positioned comfortably, contact an experienced glass-handling team instead of attempting the lift alone.
Avoid overtightening hardware against the glass
Hinges, clips, and clamps should hold the glass securely without placing excessive pressure on it. Overtightening a screw can create a stress point, chip the glass around a hole, or damage the gasket designed to cushion the connection.
Install every rubber or plastic washer supplied with the hardware, then follow the manufacturer’s tightening instructions. Tighten gradually while checking that the glass remains centered in the fitting. Do not use extra force to correct hardware that still feels loose.
If a hinge shifts after installation, inspect the anchor, gasket, and wall support instead of simply tightening the screw further. The problem may involve the substrate or a missing component. Hardware should sit squarely and hold the panel without distorting the glass or pressing directly against an exposed edge.
Use setting blocks, spacers, and alignment shims
Setting blocks support the glass and prevent its weight from resting directly on tile or metal. Spacers and alignment shims also help maintain consistent gaps between the door, fixed panels, walls, and curb.
Place these components where the hardware manufacturer specifies them. Use materials that will not scratch the glass, react with the metal, or deteriorate in a wet environment. Check each panel with a level before permanently tightening the fittings.
Shims should correct minor alignment issues, not compensate for a major measurement error or a wall that needs repair. If the glass requires excessive shimming to sit correctly, stop and reassess the opening. A stable installation depends on a sound substrate, accurate fabrication, and hardware installed in the correct position.
Install the door with the curb slope
A shower curb should direct water toward the drain, not toward the bathroom floor. If you install the door without accounting for that slope, the bottom edge may sit unevenly. The sweep may then fail to contact the curb properly, allowing water to escape beneath the door.
Check the curb before hanging the door, then position the panel so it follows the finished surface while maintaining the required glass clearance. Do not force the door to sit level if doing so leaves a large gap on one side or works against the drainage path.
If the curb is damaged, flat, or sloped in the wrong direction, repair it before installing the glass. Correcting the slope after the enclosure is in place can require removing hardware, sealant, and panels.
Fix sagging, rubbing, swinging, or latch problems
Test the door as soon as it is hung, before applying final sealant. Open it slowly and check for sagging, rubbing against a fixed panel, contact with the curb, or movement at the hinges. Close the door and confirm that the latch aligns without force.
A properly aligned door should swing freely and remain stable when left partially open, unless its hardware is designed to behave differently. Do not dismiss a small rub or difficult latch. Regular use can make the problem worse and place added stress on the glass, hinges, and wall anchors.
Correct minor alignment issues with approved hinge adjustments, setting blocks, or shims. If the door continues to sag or the hardware moves, inspect the wall support and fasteners before applying sealant.
Prevent leaks with proper slope and sweep placement
A frameless enclosure is not completely watertight, but careful layout and sealing can keep normal shower spray inside the wet area. The curb slope, panel gaps, door position, and sweep all work together to control water.
Install the sweep so it makes light, continuous contact with the curb without dragging heavily. Trim it cleanly around hinges or corners according to the product instructions. The sweep should not bunch, curl, or leave a large opening beneath the door.
Seal only the joints specified by the manufacturer, using a neat and continuous bead. Adding caulk randomly around the enclosure can hide the actual cause of a leak and may interfere with drainage. Test the door after the sealant has cured, then adjust the sweep or alignment if water escapes.
Keep drainage paths clear to prevent mold
Over-caulking is a common response to a leaking shower, but additional sealant does not always solve the problem. Some enclosures rely on open drainage paths around clips, channels, or the curb so trapped water can escape. Blocking those paths can leave moisture behind the glass and encourage mold or mildew.
Clean and dry each joint before sealing. Use compatible, mold-resistant neutral-cure silicone only where it is required, and keep weep areas and lower drainage routes open. Do not seal over gaps simply because they look unfinished.
After the sealant cures, inspect the enclosure for standing water, damp areas, or discoloration. Clean the glass, hardware, and seals regularly so buildup does not conceal a leak. Proper ventilation also helps the shower dry between uses.
Hire a professional for cracked tile, damaged glass, or failed waterproofing
Stop the installation if the tile cracks, the glass is chipped, or a panel is damaged. Never install a compromised tempered-glass panel, and do not drill additional holes to make an incorrect piece fit. Custom glass must be fabricated with the correct dimensions, edgework, and hole locations before tempering.
Waterproofing problems also require attention before the enclosure is mounted. A qualified professional can assess loose tile, missing wall support, an unstable curb, failed membrane work, or an opening that is significantly out of square. Installing glass over an unresolved water problem can lead to expensive repairs.
Glass Rescue has more than two decades of experience with residential and commercial glass projects. Its experienced team serves customers in Dade, Broward, Hillsborough, Hollywood, and Tampa, helping homeowners and businesses plan safe, custom glass installations.
How Much Does Frameless Shower Door Installation Cost?
The cost of frameless shower door installation depends on more than the glass. A simple single-door setup may cost less than a custom enclosure with fixed panels, return glass, specialty hardware, and tile preparation. The shower’s shape, wall condition, curb slope, and bathroom access can all affect the final price.
As a general reference, one installation guide estimates tools and supplies at about $300 to $600, excluding the glass kit, with professional labor ranging from roughly $800 to $1,500. These figures are not a guaranteed local price. Custom fabrication, material choices, preparation work, and labor rates in South and Central Florida may place your project outside that range. A professional frameless shower door consultation can provide a more accurate estimate after reviewing your space.
Before approving a quote, ask what the price includes. Some estimates cover only installation, while others include field measuring, glass fabrication, delivery, hardware, sealing, cleanup, and warranty coverage. Comparing the complete scope helps you understand the real project cost and avoid surprises.
Compare costs for a door, enclosure, or custom layout
A single frameless door is usually the simplest configuration. It can work well when the shower has a finished wall on one or both sides. The price generally increases when you add fixed panels, a return panel, an angled section, or a full glass enclosure.
Custom layouts require more planning because each panel must fit the opening precisely. Corner showers, neo-angle enclosures, steam showers, and unusually wide openings may need detailed field measurements and custom fabrication. Additional glass also means more clips, hinges, seals, and installation time.
Ask your installer to price the exact design you want instead of requesting a general estimate for a “glass shower door.” Compare a door-only design with a complete enclosure, and request separate pricing for each panel. This makes it easier to decide which features matter most to your budget.
Consider glass thickness, dimensions, shape, and edgework
Glass size and thickness affect material, fabrication, delivery, and handling costs. Larger or thicker panels weigh more and may require additional support, extra installers, or special equipment. Your installer can recommend an appropriate option based on the door size, hinge placement, panel layout, and manufacturer requirements.
Shape also affects the price. A standard rectangular panel is typically simpler to fabricate than glass with angled corners, notches, cutouts, or curved edges. Polished edges and custom edgework add fabrication time. Holes for hinges, handles, and clips must also be positioned accurately before the glass is tempered.
Frameless shower doors should use properly rated tempered safety glass. Since tempered glass cannot be cut or drilled after production, accurate measurements are essential. The National Glass Association provides industry information about glass products and safety considerations.
Price the door style, panels, cutouts, and specialty hardware
The door style affects both the amount of glass and the hardware required. Pivot doors, hinged doors, sliding configurations, and corner enclosures each have different installation needs. A wide door may need a support bar, while a large fixed panel may require additional clips, a channel, or a stabilizing connection.
Hardware finishes can also change the estimate. Chrome, brushed nickel, matte black, brass, and specialty finishes may vary in price and availability. Upgraded handles, towel bars, glass-to-glass connectors, stabilizer bars, and decorative hinges add to the material total.
List every feature during the design stage. A quote for a basic hinged door may not include a larger handle, custom cutout, support bar, or upgraded finish. Ask whether the price covers all selected hardware, or whether certain items are allowances that could change after ordering.
Include measuring, tile drilling, mounting, alignment, and sealing
Installation labor covers much more than lifting the door into place. It may include field measuring, layout, drilling through tile, installing anchors and clips, mounting panels, attaching hinges, aligning the door, and applying silicone. Each step requires care because a small error can affect the swing, reveal, latch, or water control.
Drilling into tile may take additional time when the tile is dense, large-format, textured, or installed over uncertain backing. The installer must use the correct bit, protect the surrounding surface, and secure the hardware to suitable support whenever possible.
Proper sealing is also part of a complete installation. Industry guidance recommends using silicone that meets ASTM C920 requirements when appropriate for the application. Silicone should be applied only to manufacturer-approved joints, while drainage paths remain open. Review the expected scope with your local glass installation team before work begins.
Compare DIY tool and material costs with professional installation
DIY installation may appear less expensive if you already own measuring tools and basic equipment. However, frameless glass requires specialized supplies, including glass-rated suction cups, diamond drill bits, anchors, setting blocks, shims, silicone, protective equipment, and compatible fasteners. You may need to purchase or rent several of these items.
There is little room for error. Tempered glass can break if an edge strikes tile, concrete, or another hard surface. Incorrect measurements may leave you with a custom panel that cannot be returned or altered. Poor alignment can cause rubbing, sagging, latch problems, or leaks.
Professional installation includes experience with heavy panels, custom hardware, tile drilling, and final adjustments. It may cost more upfront, but it can reduce the risk of damaged glass, cracked tile, water damage, and a second installation. Compare the full DIY cost with a professional quote, including tools, delivery, repairs, and your time.
Account for removal, delivery, wall repairs, and structural preparation
Your estimate may include additional charges if an old shower door or enclosure must be removed. Removal can involve taking out channels, scraping away old silicone, disposing of glass, and repairing damaged tile or wall surfaces before the new installation begins.
Delivery is another cost to consider, especially for large custom panels. Oversized glass needs careful transport and may require extra personnel or specialized handling. Narrow hallways, stairs, elevators, limited parking, and building restrictions can make delivery more involved.
The walls must support the selected hardware. If studs or solid blocking are missing, the installer may need approved anchors or structural preparation before mounting the door. Loose tile, damaged backing, flexible fiberglass, and an unstable curb should be addressed before installation. Ask for these potential costs to appear separately on the estimate.
Consider labor and access in Dade, Broward, Hollywood, Hillsborough, and Tampa
Labor rates can vary by location and project complexity. Installation in Dade County, Broward County, Hollywood, Hillsborough County, or Tampa may be priced differently based on travel distance, scheduling, parking, building access, and local demand. A single-family home may also be easier to access than a high-rise, commercial property, or occupied rental building.
Access matters because frameless panels can be large, heavy, and difficult to maneuver through tight spaces. Installers may need extra time to protect finished floors, pass glass through narrow doorways, or coordinate with building management. These details can affect the labor estimate even when the shower design is straightforward.
When requesting a quote, share the project location, floor level, parking details, bathroom access, and delivery restrictions. Glass Rescue serves customers across Dade and Broward counties and is expanding into Hillsborough County. You can contact Glass Rescue to discuss your location and installation needs.
Add a contingency for uneven walls, tile damage, or hardware changes
A modest contingency can help cover conditions that are not visible during an initial conversation. Walls that are out of plumb, corners that are out of square, and curbs with insufficient slope may require adjustments to the glass or hardware. Existing tile may also crack during drilling if it is loose, damaged, or installed over weak backing.
Hardware changes can affect the total as well. A door may need a support bar, a different hinge, a longer handle, or an alternate mounting method after the installer reviews the opening. These changes should be explained and approved before additional work begins.
Ask whether the estimate includes minor shimming, sealing, and standard adjustments. Also ask what happens if the installer discovers damaged tile, missing wall support, or a curb that does not drain correctly. A clear plan for these conditions helps you set a realistic budget.
Request itemized quotes for glass, hardware, installation, sealing, and warranty
An itemized quote makes it easier to compare proposals and understand the complete cost. Look for separate line items for glass, fabrication, hardware, delivery, removal, installation, drilling, sealing, and wall or tile preparation. The quote should identify the glass type, thickness, finish, door style, panel count, and hardware finish.
Ask whether field measuring is included and whether the installer will verify the opening before ordering custom glass. Confirm the expected installation timeline, payment schedule, cleanup responsibilities, and charges for changes or additional repairs. You should also know whether delivery and disposal are included or billed separately.
Finally, review the warranty. Find out whether it covers the glass, hardware, installation, silicone, and adjustments, since these may have different coverage periods. A detailed proposal from an experienced glass company gives you a clearer budget and establishes expectations before the first panel arrives.
When Should You Hire a Professional Installer?
A frameless shower door may look straightforward once it is finished, but installation involves much more than attaching hinges to glass. The process requires accurate measurements, careful drilling, safe handling, secure mounting, proper alignment, and watertight sealing. Tempered glass is designed for shower enclosures, but its edges can still chip or break if the panel is mishandled or placed against a hard surface.
A small measuring error can cause the door to rub, sag, swing open, or leave gaps where water can escape. Professional installation is especially valuable when the opening is uneven, the glass is heavy, or the enclosure includes several custom panels. An experienced installer can inspect the shower, identify concerns before fabrication, and recommend hardware that suits the layout.
A simple, standard opening may be manageable for an experienced DIYer with the right equipment and a reliable helper. However, hiring a professional can reduce the risk of injury, glass damage, tile damage, and expensive rework. Before scheduling the job, review the installer’s shower glass services, service area, experience, and warranty terms.
Get help with heavy tempered-glass panels and difficult access
Frameless shower panels are heavy, awkward to carry, and difficult to control in a narrow bathroom. Even a single door may require two or more people to lift, position, and hold while hinges or clips are secured. Glass-rated suction cups can improve grip, but they do not replace safe lifting methods, protective equipment, or a clear route into the bathroom.
Hire a professional if the shower is upstairs, access is tight, or the glass must pass around corners, fixtures, or finished surfaces. A trained installation team can protect the panel edges, walls, flooring, and tile while moving each piece into position. This helps reduce the risk of cracked glass, damaged finishes, and injuries during the job.
Hire an expert for custom shapes, corners, and multiple panels
Custom shower layouts require more than one width and height measurement. Corner enclosures, angled walls, return panels, transoms, and multiple fixed panels must fit together with consistent gaps. The installer also needs to plan hinge placement, panel support, door clearance, and the direction of water flow.
Professional help is useful when the shower includes a curved, notched, or out-of-square opening. An experienced glass installer can take detailed field measurements and coordinate them with the fabricator before production begins. Glass Rescue provides custom glass solutions for residential and commercial projects, helping clients choose a layout that fits the space rather than forcing a standard door into a difficult opening.
Call a professional when studs or wall blocking remain uncertain
Hinges, clips, and support bars need solid backing. Tile alone cannot reliably support heavy shower hardware. Depending on the wall construction, the attachment point may need to connect to a stud, wood blocking, masonry, or an approved anchor system made for the surface.
If you cannot confirm what is behind the tile, do not guess before drilling. A professional can assess the wall, locate suitable attachment points, and identify possible plumbing or electrical lines. This is especially important for wide doors and fixed panels, which place additional weight and force on their mounting hardware. Proper support helps the enclosure remain stable during regular use.
Avoid DIY when tile, waterproofing, or the curb needs repair
Do not install a shower door over loose tile, cracked grout, a soft wall surface, or a damaged curb. These problems can prevent hardware from sitting securely and may allow moisture to reach the wall structure. If the shower lacks proper waterproofing, adding silicone around the door will not correct the underlying issue.
Have the area inspected before ordering custom glass if you notice movement, staining, persistent moisture, or cracks near the curb. A qualified installer can explain whether the shower needs tile repairs, new backing, waterproofing work, or curb correction first. Fixing these conditions early is usually less disruptive than removing a finished enclosure to repair the surface underneath.
Hire an expert for uneven walls, out-of-square openings, or poor slope
Frameless doors need carefully planned clearances because they do not have a frame to conceal irregularities. Walls that are not plumb, openings that are out of square, and curbs with inconsistent slopes can affect alignment and sealing. These conditions may lead to rubbing, gaps, unwanted movement, or water reaching the bathroom floor.
A professional can measure the opening at several points and determine whether the glass needs special sizing, tapered cuts, additional clips, or a different configuration. The curb should direct water toward the drain, while the door and sweep should follow its slope. If the shower base is uneven, discuss the condition before fabrication begins, when changes are easier to plan.
Use professional support for commercial, accessible, or high-traffic bathrooms
Commercial and high-traffic bathrooms place greater demands on glass and hardware. Frequent use can expose weak mounting points, poor alignment, and inadequate seals quickly. Accessible bathrooms may also require careful planning for door width, swing clearance, handle placement, and applicable building requirements.
Professional installation helps ensure the enclosure suits the way people use the space. It also makes it easier to coordinate multiple bathrooms, repeat layouts, delivery schedules, and maintenance needs. For a larger project, ask about the company’s commercial glass installation experience, including field measurements, installation sequencing, site protection, and post-installation adjustments.
Confirm field measuring, fabrication, installation, sealing, and warranty coverage
Before hiring an installer, clarify which parts of the project are included. A complete service may cover field measuring, custom glass fabrication, hardware selection, delivery, installation, sealing, cleanup, and adjustments. If one company measures the opening and another installs the glass, confirm who is responsible if a panel does not fit.
Ask for written details about glass thickness, hardware finishes, lead times, sealant, and warranty coverage. Find out whether the warranty applies to the glass, hardware, installation, or specific defects. It is also helpful to confirm who handles service if the door needs realignment or a seal needs attention after installation. Clear terms prevent confusion once the work is complete.
Choose an installer with glass experience, insurance, and references
Look for a company that regularly installs shower glass, rather than a general handyman who only occasionally mounts bathroom hardware. Ask how the installer protects tempered glass, drills through tile, verifies wall support, and handles adjustments after the door is hung. Specific experience matters because frameless systems leave little room to conceal installation errors.
Confirm that the company carries appropriate insurance and can provide recent references or project examples. Read reviews with attention to communication, measurement accuracy, finish quality, and service after installation. Glass Rescue’s About Us page provides more information about the company’s experience and approach to residential and commercial glass work.
Choose Glass Rescue for installation support across South and Central Florida
Homeowners and businesses in Dade County, Broward County, Hollywood, Hillsborough County, and Tampa can contact Glass Rescue for assistance with frameless shower doors and other glass projects. The company has more than two decades of experience with residential installations, commercial storefronts, glass walls, partitions, mirrors, and glass replacement.
Whether you need help planning a new enclosure or addressing a difficult opening, Glass Rescue can discuss the layout, glass options, hardware, and installation requirements. Visit the contact page to request information about your project, service area, and next steps.
Frequently Asked Questions
Is a frameless shower door a good choice for every bathroom?
Not always. Frameless glass works best when the shower has strong wall support, a properly sloped curb, stable tile, and an opening that can be measured accurately. A framed or semi-frameless enclosure may be more suitable for flexible walls, unusually wide openings, sliding doors, or areas that need additional structural support.
How do I know what size frameless shower door to order?
Take final measurements only after the tile, grout, curb, and other finishes are complete. Measure the width at the top, middle, and bottom, then check the height, wall alignment, corner angles, curb slope, and door clearance. Since tempered glass cannot be cut after fabrication, professional field measuring is a smart choice for custom layouts.
Can I install a frameless shower door myself?
A standard enclosure may be possible for an experienced DIYer with suitable tools and reliable assistance. However, heavy glass panels, tile drilling, wall anchors, hinge alignment, and sealing require careful handling. Professional installation is recommended when the glass is oversized, the walls are uneven, the backing is uncertain, or the shower includes multiple panels.
How long should silicone cure before I use the shower?
Follow the sealant manufacturer’s instructions, since curing time depends on the product, bead size, humidity, and ventilation. Many bathroom silicones need about 24 to 48 hours. Keep the enclosure dry during this period, then perform a gentle water test to check the sweep, curb, panel joints, and approved sealed seams.
How much does a frameless shower door installation cost?
Pricing depends on the glass size and thickness, enclosure style, number of panels, hardware, custom cutouts, delivery, installation, and any tile or wall repairs. Ask for an itemized quote that identifies field measuring, fabrication, hardware, sealing, cleanup, and warranty coverage. Glass Rescue can review your project in Dade, Broward, Hillsborough, Hollywood, and Tampa.